Our family loves Mexican food, Makenna included. I make a variety of Mexican dishes but this one is by far our favorite. It's also probably one of the meals I make most often for us in general.
I love this recipe because it's such good comfort food and so very easy to make, too. It's warm and gooey and really cheesy. This would be a very easy recipe to alter to your personal preferences by adding or changing ingredients slightly.
The burritos warm up really nicely as leftovers and we usually get about three nights of dinners from this one dish!
Cheesy Beef and Bean Burritos
Ingredients:
2 pkg. of fajita-size tortillas
1 lb. lean ground beef
16 oz. shredded mild cheddar cheese
1 can refried beans
1 can red enchilada sauce
1 packet taco seasoning mix
Preparation:
Brown the ground beef in a skillet and drain the grease. Add 3/4 cups of water along with the taco seasoning packet and simmer for 5 minutes. Add the can of refried beans to the meat and warm the beans until they mix in evenly with the beef.
To prepare the burritos, drop a spoonful of enchilada sauce onto a tortilla and use the back the spoon to spread the sauce evenly across the tortilla. Spoon a line of the beef and bean mixture across the tortilla, slightly off-center. Sprinkle the beef and beans with a bit of shredded cheddar cheese, then roll the tortilla and place into a 9x13 pan. Repeat until the pan is filled and beef and bean mixture is used up. {I am usually able to make 13-14 burritos, squeezing the last one or two onto the side of the dish.}
Pour the remaining enchilada sauce {about half of the can} over the top of the burritos in the dish. Use the back of the spoon to spread the sauce evenly over all of the burritos, making sure all surfaces of the tortillas are wet with sauce. Sprinkle the top of all the burritos with more shredded cheddar cheese. {We love cheese in our family, so I am very generous with this part!}
Bake for 15 minutes in an oven that has been preheated to 350 degrees.
{We love to eat this dinner with a side of guacamole and chips.}
Enjoy!
Showing posts with label Recipes. Show all posts
April 16, 2015
October 21, 2012
Autumn Treat: Homemade Caramel Apples
Like everyone else on the planet, I adore Fall and celebrating it in all it's glory. How can one resist? One of my more recent favorite Fall traditions is to make homemade caramel apples. They are incredibly easy and incredibly delicious; such a treat. Last week I made a tray of these beauties to bring as the "snack to share" at our Bible Study small group.
To make some of your own, you'll need the following:
~a bag or two of Kraft Caramel Bits {one bag will cover 4-5 medium apples}
~apples of your choice, washed and thoroughly dried
~skewer sticks {I found the shorter, thicker kind in the kitchen supply section of my local grocery store}
~a variety of toppings of your choosing {I used mini chocolate chips, chopped peanuts, sprinkles, and chopped milk chocolate bits}
The Kraft caramel bits are wonderful. You can melt them on the stovetop or in the microwave with a touch of water. I recommend the microwave. I used the stovetop last year, but as it is inevitable you'll need to re-heat the caramel as you're using it, the microwave is much handier for the re-heating process.
The trickiest part of coating the apples is the consistency of the melted caramel. You need the caramel to be just the right temperature--too hot, and it will run off the apples and pool at the bottom; too cool and it will look lumpy as it coats the apples. A trial-and-error process is really the only way to learn. It's a given that some of the caramel will pool at the bottom of the apples as they cool, so remember that when you use the toppings, they will slide down the apple a bit. Putting them in the fridge directly after you coat them helps to speed up the cooling process.
These would also make great hand-outs for a party or gathering! They look especially pretty tied up with a bit of cellophane and ribbon.
I am sure this is a Fall tradition that will stay in our family for years, especially now that I'll have a little girl to help me make these in the future! I hope you try making these homemade caramel apples for yourselves--it's just too fun and too delicious to resist.
Happy Fall!
May 16, 2012
Oatmeal Pancakes with Walnut Butter
Breakfast is most definitely my favorite meal of the day. I could eat breakfast food for any meal!
Whether you're a breakfast-fanatic like me or not, I guarantee these oatmeal pancakes will make you melt. And the killer part? Well, that's the rich Walnut Butter topping.
If you're looking for a sweet start to your day, look no further.
Oatmeal Pancakes
Ingredients:
2 cups old-fashioned oatmeal
2 1/2 cups buttermilk
2 eggs, lightly beaten
1/4 cup melted butter
1/2 cup all-purpose flour
1 tsp. baking soda
1 tsp. baking powder
1/2 tsp. salt
2 Tbsp. sugar
1/2 cup firmly packed brown sugar
To make pancakes: The night before, combine the oatmeal and buttermilk in a medium bowl; cover and refrigerate overnight.
{It will look like this in the morning}:
While griddle is preheating to medium, add eggs and butter to oatmeal mixture and stir to combine.
Sift together the flour, baking soda, baking powder, and salt.
Stir the sugars into the flour mixture, then add it all to the oatmeal mixture. Mix to combine, but do not over-mix.
{Your batter will look like this}:
Make sure griddle is not too hot as it takes time for the oatmeal to cook.
Lightly spray the griddle with non-stick cooking spray.
Scoop batter onto the griddle and cook until golden brown on the bottom. {It will take roughly 4 to 5 minutes to cook the first side.}
Turn pancake and cook until golden brown on second side and cooked through. Repeat with remaining batter.
*Note: The cooking time for one of these pancakes is about triple the time it takes to cook an average pancake, so it's really best if you have a pancake griddle. If you're like me and don't have one, I recommend having several hot pans on the stove top so you can cook a few pancakes simultaneously--otherwise it will take you FOREVER to make all the pancakes on a single pan!!*
Walnut Butter
Ingredients:
1/2 cup butter
2 tsp. sugar
1 Tbsp. firmly packed brown sugar
1/4 c. toasted walnuts
Prep: Combine all ingredients the night before you make the pancakes, then refrigerate overnight. This allows for all the flavors to combine.
To serve: Warm up the walnut butter in the microwave. We always melt the butter completely, then pour it over our pancakes as our "syrup." {This recipe has been around in our family for years...we adore it!}
Make sure to have a spoon in the butter so you can get some walnuts onto the pancakes.
If you prefer, just soften the walnut butter in the microwave and spread over the pancakes.
Skip the walnut butter altogether if you'd like; these deliciously sweet pancakes are great with just maple syrup. They also taste incredible with a little peanut butter spread on top, but that's a personal preference--I've always loved peanut butter on my pancakes!
The recipe says the pancakes are also wonderful with berry compote or syrup.
I pretty much dare you to not go weak-in-the-knees over these amazingly scrumptious pancakes...especially topped with the walnut butter!
The prepared pancakes refrigerate well for several days. And if you'd prefer to cook only a few at a time, the pancake batter also keeps well in the refrigerator for a few days {the walnut butter, too}.
Enjoy, everyone!
Whether you're a breakfast-fanatic like me or not, I guarantee these oatmeal pancakes will make you melt. And the killer part? Well, that's the rich Walnut Butter topping.
If you're looking for a sweet start to your day, look no further.
Oatmeal Pancakes
Ingredients:
2 cups old-fashioned oatmeal
2 1/2 cups buttermilk
2 eggs, lightly beaten
1/4 cup melted butter
1/2 cup all-purpose flour
1 tsp. baking soda
1 tsp. baking powder
1/2 tsp. salt
2 Tbsp. sugar
1/2 cup firmly packed brown sugar
To make pancakes: The night before, combine the oatmeal and buttermilk in a medium bowl; cover and refrigerate overnight.
{It will look like this in the morning}:
While griddle is preheating to medium, add eggs and butter to oatmeal mixture and stir to combine.
Sift together the flour, baking soda, baking powder, and salt.
Stir the sugars into the flour mixture, then add it all to the oatmeal mixture. Mix to combine, but do not over-mix.
{Your batter will look like this}:
Make sure griddle is not too hot as it takes time for the oatmeal to cook.
Lightly spray the griddle with non-stick cooking spray.
Scoop batter onto the griddle and cook until golden brown on the bottom. {It will take roughly 4 to 5 minutes to cook the first side.}
Turn pancake and cook until golden brown on second side and cooked through. Repeat with remaining batter.
*Note: The cooking time for one of these pancakes is about triple the time it takes to cook an average pancake, so it's really best if you have a pancake griddle. If you're like me and don't have one, I recommend having several hot pans on the stove top so you can cook a few pancakes simultaneously--otherwise it will take you FOREVER to make all the pancakes on a single pan!!*
Walnut Butter
Ingredients:
1/2 cup butter
2 tsp. sugar
1 Tbsp. firmly packed brown sugar
1/4 c. toasted walnuts
Prep: Combine all ingredients the night before you make the pancakes, then refrigerate overnight. This allows for all the flavors to combine.
To serve: Warm up the walnut butter in the microwave. We always melt the butter completely, then pour it over our pancakes as our "syrup." {This recipe has been around in our family for years...we adore it!}
Make sure to have a spoon in the butter so you can get some walnuts onto the pancakes.
If you prefer, just soften the walnut butter in the microwave and spread over the pancakes.
Skip the walnut butter altogether if you'd like; these deliciously sweet pancakes are great with just maple syrup. They also taste incredible with a little peanut butter spread on top, but that's a personal preference--I've always loved peanut butter on my pancakes!
The recipe says the pancakes are also wonderful with berry compote or syrup.
I pretty much dare you to not go weak-in-the-knees over these amazingly scrumptious pancakes...especially topped with the walnut butter!
The prepared pancakes refrigerate well for several days. And if you'd prefer to cook only a few at a time, the pancake batter also keeps well in the refrigerator for a few days {the walnut butter, too}.
Enjoy, everyone!
May 5, 2012
Irish Soda Bread
I first made this bread back in March for our sweet little St. Paddy's Day celebration. I've made it a few times since because it's so easy and so delicious. This bread requires no yeast, so it's simply mix, bake, done.
The crust of the bread is crunchy, but the inside is soft and moist. The texture of the bread is more biscuit-like than a standard bread made with yeast, so it's much more filling.
Plus, this bread is made with buttermilk, so you already know it's going to be amazing...
Irish Soda Bread
Ingredients:
4 cups all-purpose flour, plus extra for dusting
1 1/2 tsp. baking soda
1 1/2 tsp. cream of tartar
1 tsp. salt
3 Tbsp. sugar
4 Tbsp. unsalted butter
1 large egg, beaten
1 1/2 cups buttermilk
Instructions:
1. Preheat oven to 425 degrees {F} and grease and flour a 9-inch round baking dish.
{I actually baked mine in a pie plate}
2. In a large mixing bowl, whisk together the flour, baking soda, cream of tartar, salt and sugar.
3. Rub in the butter with your fingertips until it is completely rubbed in. The mixture will be floury because of the much higher proportion of flour. With a wooden spoon stir or fold in the egg and buttermilk until a dough begins to form. Turn the dough onto a flour-dusted surface and knead briefly just until the dough comes together. Form the dough into a round and dust the top with extra flour. Place the dough into the prepared pan and score an X about 1/2-inch deep on the top of the dough.
4. Bake for 15 minutes, then reduce heat to 350 degrees {F} and bake another 40 minutes until the bottom is dark golden brown.
5. Cool completely on a wire rack before serving.
It may not be the prettiest-looking bread you ever did see, but still...
...it is absolutely and utterly delicious.
My recipe book says the bread is best the day it is served, but I disagree. Matt and I found this bread to be just as fresh-tasting and delicious even two days later. It does, however, make for some marvelous toast in the days after you bake it.
A little smear of butter and some jam or honey and you've got a tiny slice of heaven.
And if you're making a thick and meaty stew, there is no other bread that could offer a better accompaniment than this.
Enjoy!
*Recipe courtesy of The Unofficial Harry Potter Cookbook.*
The crust of the bread is crunchy, but the inside is soft and moist. The texture of the bread is more biscuit-like than a standard bread made with yeast, so it's much more filling.
Plus, this bread is made with buttermilk, so you already know it's going to be amazing...
Irish Soda Bread
Ingredients:
4 cups all-purpose flour, plus extra for dusting
1 1/2 tsp. baking soda
1 1/2 tsp. cream of tartar
1 tsp. salt
3 Tbsp. sugar
4 Tbsp. unsalted butter
1 large egg, beaten
1 1/2 cups buttermilk
Instructions:
1. Preheat oven to 425 degrees {F} and grease and flour a 9-inch round baking dish.
{I actually baked mine in a pie plate}
2. In a large mixing bowl, whisk together the flour, baking soda, cream of tartar, salt and sugar.
3. Rub in the butter with your fingertips until it is completely rubbed in. The mixture will be floury because of the much higher proportion of flour. With a wooden spoon stir or fold in the egg and buttermilk until a dough begins to form. Turn the dough onto a flour-dusted surface and knead briefly just until the dough comes together. Form the dough into a round and dust the top with extra flour. Place the dough into the prepared pan and score an X about 1/2-inch deep on the top of the dough.
4. Bake for 15 minutes, then reduce heat to 350 degrees {F} and bake another 40 minutes until the bottom is dark golden brown.
5. Cool completely on a wire rack before serving.
It may not be the prettiest-looking bread you ever did see, but still...
...it is absolutely and utterly delicious.
My recipe book says the bread is best the day it is served, but I disagree. Matt and I found this bread to be just as fresh-tasting and delicious even two days later. It does, however, make for some marvelous toast in the days after you bake it.
A little smear of butter and some jam or honey and you've got a tiny slice of heaven.
And if you're making a thick and meaty stew, there is no other bread that could offer a better accompaniment than this.
Enjoy!
*Recipe courtesy of The Unofficial Harry Potter Cookbook.*
April 30, 2012
Kale Chips
Matt came home from work last week talking about a recipe he heard of and wanted me to try--Kale Chips.
I hadn't heard of these, but as soon as I hopped online to look for recipes, I quickly saw how popular they've become. The recipe really couldn't get any easier and people were raving about them, so I was all for giving them a try.
The recipes I found online were mostly similar with slight variations in the baking time and temperature. I ended up following this recipe from Smitten Kitchen.
Kale Chips
Ingredients:
1 bunch {about 6 oz} kale
1 Tbsp. olive oil
kosher salt, to taste
Preheat oven to 300 degrees {F}.
You may rinse and dry the kale first before tearing or cutting it into pieces, whereas I tore first and then washed and dried. Regardless, the stems and rough center ribs must be removed. You can make the "chips" into any size pieces, keeping in mind that they shrink considerably during baking.
By the way, does anyone else out there love using salad spinners? I adore mine...
Once the pieces are cleaned and dried, place them in a large mixing bowl and add the olive oil. I can't quite remember where, but somewhere online I saw a reader suggest using one's hands to massage the olive oil into the pieces. I did so and thought it worked splendidly.
I also read several comments online saying it was easy to over-salt the chips. What I did was to lay out the kale pieces in a single layer on a parchment-lined baking sheet, then sprinkled the salt on top. Be careful not to miss a piece...salt is definitely needed for good flavoring!
To finish: bake 20 minutes or until crisp, then place the baking sheet on a rack to cool.
I also read online that it was easy to over-bake these, but I found 20 minutes to be perfect. I was pleasantly surprised at the very light and very crispy texture of these kale chips--they almost seemed to dissolve in my mouth after a crunch or two.
This is a fantastic way to sneak a super-healthy food into one's diet. Matt loved these more than I did, although I did find it hard to stop popping them in my mouth. Next time I may try using seasoning salt instead of plain kosher salt--I saw several recipes online using that.
This is a fun and easy recipe to try--thanks, Smitten Kitchen!
I hadn't heard of these, but as soon as I hopped online to look for recipes, I quickly saw how popular they've become. The recipe really couldn't get any easier and people were raving about them, so I was all for giving them a try.
The recipes I found online were mostly similar with slight variations in the baking time and temperature. I ended up following this recipe from Smitten Kitchen.
Kale Chips
Ingredients:
1 bunch {about 6 oz} kale
1 Tbsp. olive oil
kosher salt, to taste
Preheat oven to 300 degrees {F}.
You may rinse and dry the kale first before tearing or cutting it into pieces, whereas I tore first and then washed and dried. Regardless, the stems and rough center ribs must be removed. You can make the "chips" into any size pieces, keeping in mind that they shrink considerably during baking.
By the way, does anyone else out there love using salad spinners? I adore mine...
Once the pieces are cleaned and dried, place them in a large mixing bowl and add the olive oil. I can't quite remember where, but somewhere online I saw a reader suggest using one's hands to massage the olive oil into the pieces. I did so and thought it worked splendidly.
I also read several comments online saying it was easy to over-salt the chips. What I did was to lay out the kale pieces in a single layer on a parchment-lined baking sheet, then sprinkled the salt on top. Be careful not to miss a piece...salt is definitely needed for good flavoring!
To finish: bake 20 minutes or until crisp, then place the baking sheet on a rack to cool.
I also read online that it was easy to over-bake these, but I found 20 minutes to be perfect. I was pleasantly surprised at the very light and very crispy texture of these kale chips--they almost seemed to dissolve in my mouth after a crunch or two.
This is a fantastic way to sneak a super-healthy food into one's diet. Matt loved these more than I did, although I did find it hard to stop popping them in my mouth. Next time I may try using seasoning salt instead of plain kosher salt--I saw several recipes online using that.
This is a fun and easy recipe to try--thanks, Smitten Kitchen!
April 7, 2012
Six Spots of Happiness
Six little things making me happy lately:
1. Mouthfuls of scrumptious taco dip
2. Funny little Lego characters
3. Wrapping my hands around hot mugs of delicious chai tea {the weather is still quite chilly!}
4. My gorgeous hand-painted egg ornament from Hungary
5. A muffin mix that magically makes the most delectable poppyseed muffins
6. A new set of wallets of my most-adorable nephew Will to tote around and brag with:
1. Mouthfuls of scrumptious taco dip
2. Funny little Lego characters
| {Someone in our family really loves Legos. Hint: it's not me, and it's not Annabelle!} |
4. My gorgeous hand-painted egg ornament from Hungary
5. A muffin mix that magically makes the most delectable poppyseed muffins
| {If you like poppyseed muffins [and almond-flavored at that], you HAVE TO try this mix! It will rock your world.} |
6. A new set of wallets of my most-adorable nephew Will to tote around and brag with:
Happy Easter Weekend, everyone!
April 1, 2012
Taco Bake
This is a recipe from Kraft Food & Family Magazine that Matt and I have loved for years. It's a quick and easy casserole full of the yummiest flavors, and it has Kraft Mac n' Cheese in it...who wouldn't love it?!
Often when I make recipes, I'm looking to lessen the calorie count wherever possible and this recipe is no exception. I use lean ground beef, prepare the mac and cheese with skim milk and less {unsalted} butter, use either low-fat or non-fat sour cream, and reduced fat shredded cheese. It makes a big difference in calories and I truly believe that the difference in taste is undetectable.
Taco Bake
Ingredients:
1 pkg. Kraft macaroni & cheese
1 lb. lean ground beef
1 packet taco seasoning mix
3/4 cup water
3/4 cup sour cream {I use less...not a huge fan of sour cream, so I use about 1/3 to 1/2 cups}
1-1/2 cups shredded cheddar cheese {or I used "Mexican" shredded cheese...a blend of four cheeses}
1 cup salsa
*coarsely crushed tortilla chips {optional}
Instructions:
Preheat oven to 400 degrees {F}. Prepare macaroni dinner as direction on package. While macaroni is cooking, brown the meat; drain. Add taco seasoning mix and water to the meat; simmer for 5 minutes.
When macaroni dinner is complete, stir in the sour cream. Spoon half of the macaroni dinner into an 8-inch square or 9-inch round baking dish; top with layers of meat mixture, one cup of the cheese, then one more layer each of macaroni dinner and meat mixture to finish.
Cover and bake for 15 minutes.
Top with salsa and remaining 1/2 cup cheese {I usually add more than that}. Bake, uncovered, for an additional 5 minutes or until cheese is melted.
*For extra crunch, prepare and bake as directed, topping with about 1/2 cup of coarsely crushed tortilla chips along with the salsa and cheese. {We always add these}.
Often when I make recipes, I'm looking to lessen the calorie count wherever possible and this recipe is no exception. I use lean ground beef, prepare the mac and cheese with skim milk and less {unsalted} butter, use either low-fat or non-fat sour cream, and reduced fat shredded cheese. It makes a big difference in calories and I truly believe that the difference in taste is undetectable.
Taco Bake
Ingredients:
1 pkg. Kraft macaroni & cheese
1 lb. lean ground beef
1 packet taco seasoning mix
3/4 cup water
3/4 cup sour cream {I use less...not a huge fan of sour cream, so I use about 1/3 to 1/2 cups}
1-1/2 cups shredded cheddar cheese {or I used "Mexican" shredded cheese...a blend of four cheeses}
1 cup salsa
*coarsely crushed tortilla chips {optional}
Instructions:
Preheat oven to 400 degrees {F}. Prepare macaroni dinner as direction on package. While macaroni is cooking, brown the meat; drain. Add taco seasoning mix and water to the meat; simmer for 5 minutes.
When macaroni dinner is complete, stir in the sour cream. Spoon half of the macaroni dinner into an 8-inch square or 9-inch round baking dish; top with layers of meat mixture, one cup of the cheese, then one more layer each of macaroni dinner and meat mixture to finish.
Cover and bake for 15 minutes.
Top with salsa and remaining 1/2 cup cheese {I usually add more than that}. Bake, uncovered, for an additional 5 minutes or until cheese is melted.
*For extra crunch, prepare and bake as directed, topping with about 1/2 cup of coarsely crushed tortilla chips along with the salsa and cheese. {We always add these}.
Serve hot and get ready for some cheesy, crunchy, taco-y goodness! Enjoy!
March 12, 2012
Peanut Butter Oatmeal Cookies
OK, peanut butter-lovers out there, I've got another mouth-wateringly delicious recipe for you! These cookies are super-easy to make and although I can't promise that they are really all that healthy for you, they at least feel healthier, since the recipe calls for 3 heaping cups of oatmeal.
This is a recipe I inherited at one of my bridal showers and I must confess that I never made these cookies until just recently. {Which is such a shame since Matt and I discovered just how scrumptious and addicting these cookies can be!} I've taken them to a few gatherings since then and the cookies always receive rave reviews as people gobble them up.
Peanut Butter Oatmeal Cookies
Ingredients:
3/4 cups butter
1 cup sugar
1 egg
1 cup peanut butter
1/4 cup water
1 tsp. vanilla
1 cup flour
1/2 tsp. salt
1/2 tsp. baking soda
3 cups oatmeal
1 package chocolate chips
Instructions:
Preheat oven to 350 degrees {F}.
Cream together the {room temp.} butter and the sugar. Add the egg. Add the peanut butter, vanilla, and water and mix until just combined. Slowly add the dry ingredients; first, the flour, salt, and baking soda, and finally the oatmeal. Stir in the chocolate chips.
Either using a cookie scoop or a regular spoon, drop small, rounded spoonfuls onto ungreased cookie sheets. Bake for 12-15 minutes. {makes approximately 4 dozen cookies}
I would definitely recommend indulging in these cookies with a glass of milk. Although the cookies are chewy, they're not moist like regular chocolate chip cookies, given all the oatmeal. But of course, most any peanut-buttery, chocolatey cookie tastes best with a tall glass of ice-cold milk!
I hope you love this recipe! Enjoy!
This is a recipe I inherited at one of my bridal showers and I must confess that I never made these cookies until just recently. {Which is such a shame since Matt and I discovered just how scrumptious and addicting these cookies can be!} I've taken them to a few gatherings since then and the cookies always receive rave reviews as people gobble them up.
Peanut Butter Oatmeal Cookies
Ingredients:
3/4 cups butter
1 cup sugar
1 egg
1 cup peanut butter
1/4 cup water
1 tsp. vanilla
1 cup flour
1/2 tsp. salt
1/2 tsp. baking soda
3 cups oatmeal
1 package chocolate chips
Instructions:
Preheat oven to 350 degrees {F}.
Cream together the {room temp.} butter and the sugar. Add the egg. Add the peanut butter, vanilla, and water and mix until just combined. Slowly add the dry ingredients; first, the flour, salt, and baking soda, and finally the oatmeal. Stir in the chocolate chips.
Either using a cookie scoop or a regular spoon, drop small, rounded spoonfuls onto ungreased cookie sheets. Bake for 12-15 minutes. {makes approximately 4 dozen cookies}
I would definitely recommend indulging in these cookies with a glass of milk. Although the cookies are chewy, they're not moist like regular chocolate chip cookies, given all the oatmeal. But of course, most any peanut-buttery, chocolatey cookie tastes best with a tall glass of ice-cold milk!
I hope you love this recipe! Enjoy!
February 29, 2012
Peanut Butter Applesauce Muffins
I shall now share with you a family recipe, and one of my very favorite recipes in the whole world, at that. I grew up on this recipe and for any of you who know me personally, you have probably tried these before! I bake these often.
These muffins are beyond amazing. Calling them a sweet delight would be a tragic understatement. They have it all...peanut butter? Check. Chocolate chips? Check. Applesauce to make them incredibly moist? Check.
You can also thank me because...{drumroll, please}...I give you permission to consume these treats as breakfast food. Yes, that's right. This recipe came from my Aunt and much to my mother's dismay, she firmly insisted these muffins are "breakfast food." So they have always been in the Moss household, and now are in the Perry household. You may offer me a preliminary "thanks" now, but really, thank me later, after you have baked these and consumed them in all their deliciousness.
Peanut Butter Applesauce Muffins
Ingredients:
1/2 cup butter
1 cup sugar
1/2 cup peanut butter
2 eggs
1 cup applesauce {plain}
2 cups flour
1 tsp. baking powder
1/2 tsp. salt
1/2 tsp. baking soda
1 pkg. chocolate chips
Instructions:
Preheat the oven to 350 degrees {F}.
Mix butter and sugar until fluffy. Add peanut butter and eggs and beat until smooth. Add the applesauce. Add the remaining dry ingredients. Mix in the chocolate chips.
Fill paper cups 2/3 full. {I am overly-generous on this part because I don't like short muffins.}
Enjoy! {and I am completely certain that you will!}
February 1, 2012
Slow-Cooker Hearty Beef Chili
In light of the approaching Superbowl Sunday, I'm taking a quick break from blogging about our honeymoon cruise to share a delicious chili recipe with you. I don't know about you, but chili has always seemed to me as not only a good wintertime food, but the perfect accompaniment to watching some good 'ole football.
This recipe is easy to prepare ahead of time and have ready for kick off. A crock pot will also keep it warm for you throughout the duration of the game.
Slow-Cooker Hearty Beef Chili
Ingredients:
1 1/2 lbs. lean ground beef
1 can {15 oz.} dark red kidney beans, rinsed
1 can light red kidney beans, rinsed
1 1/2 cups salsa
1 can {15 oz.} tomato sauce
2 Tbsp. chili powder
1 onion, chopped
1 cup corn
cheddar cheese {for serving}
Preparation:
Brown the meat and drain. Add to slow cooker with all other ingredients except cheese; stir well. Cover with lid. Cook on low 5-6 hours or high 3-4 hours.
{Here are the ingredients mixed together pre-cooking time in the Crock Pot}:
Serve topped with cheddar cheese. {Crackers are a great addition, too.}
Enjoy!
*I must tell you, this chili is T.H.I.C.K. It's really not very soup-y. Matt and I really love this recipe, but if you prefer your chili to have a more soup-like consistency, then this recipe probably isn't for you.*
This recipe is easy to prepare ahead of time and have ready for kick off. A crock pot will also keep it warm for you throughout the duration of the game.
Slow-Cooker Hearty Beef Chili
Ingredients:
1 1/2 lbs. lean ground beef
1 can {15 oz.} dark red kidney beans, rinsed
1 can light red kidney beans, rinsed
1 1/2 cups salsa
1 can {15 oz.} tomato sauce
2 Tbsp. chili powder
1 onion, chopped
1 cup corn
cheddar cheese {for serving}
Preparation:
Brown the meat and drain. Add to slow cooker with all other ingredients except cheese; stir well. Cover with lid. Cook on low 5-6 hours or high 3-4 hours.
{Here are the ingredients mixed together pre-cooking time in the Crock Pot}:
Serve topped with cheddar cheese. {Crackers are a great addition, too.}
Enjoy!
*I must tell you, this chili is T.H.I.C.K. It's really not very soup-y. Matt and I really love this recipe, but if you prefer your chili to have a more soup-like consistency, then this recipe probably isn't for you.*
January 22, 2012
Throw Together Some YUM
I definitely wouldn't describe myself as "innovative" in the kitchen. I am most definitely a recipe-girl. The times when I have experimented in the kitchen are few and far between, although I'm hopeful I'll become more experimental over the years.
That said, the below salad and dessert ideas are something I pretty much just threw together. I can't take credit for originality, however, as my ideas really came from other sources. So please forgive the lack of precise amounts and measurements!
First off: my version of a Southwestern-style salad. I came up with this based off of what I have enjoyed most in restaurants when I order this kind of salad.
Southwestern Salad
{you'll want to adjust the amount of ingredients according to your own preferences, but what I list below makes enough for two nights of Southwestern Salad for Matt and myself as the main course--so 4 large salad servings altogether}
Ingredients:
1 package chicken breasts
1 large container of Organic Spring Mix lettuces
1 bag of "Taco" cheese {we definitely don't use the whole bag}
1 can black beans, drained and rinsed
1 can sweet whole-kernel corn, drained and rinsed
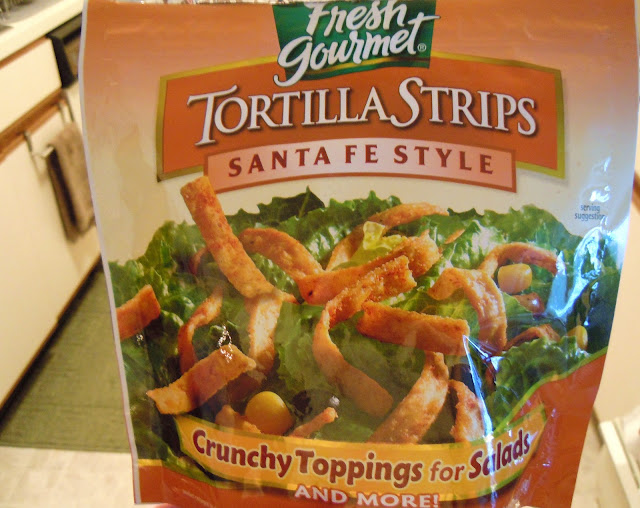
1 package Santa-Fe Style tortilla strips
1 container of a Chipolte salad dressing
I love this brand of tortilla strips:
This Southwest Chipotle dressing is exceptionally good, and it's not too bad calorie-wise {100 calories per 2 Tbsp.}:
Basically, the only prep I really need to do for this recipe {besides draining and rinsing the beans/corn} is to cook the chicken. I cook mine in the oven {20-25 min at 400 degrees F}, but I rub the chicken first with a mixture of poultry seasoning, a little kosher salt, and ground pepper. You can chop or shred your chicken; I like mine chopped. I've also cooked my chicken on the stove top to get more of a blackened-chicken, which is good, too!
Throw it all together and you've got a sweet, tangy, crunchy, utterly delicious salad! Like I mentioned, Matt and I like to eat this as our main dish, but it would be great as a side salad, too.
The picture below shows the ingredients pre-tossed; you can't see it, but there's a whole lot of lettuce under there!
I got this dessert idea from a photo I saw on Pinterest, although I never went to the link. It's my version of a banana cream pie trifle!
Banana Cream Pie Trifle
Ingredients:
1 package instant, sugar-free Banana Cream pudding, prepared with skim milk
fat free whipped topping
2 bananas
approximately 25-30 Nilla wafers, turned to crumbs in a food processor
All I did is layer the ingredients; first, the Nilla crumbs, then the pudding, then the bananas, then the whipped topping, and repeat.
What I prepared in the photo above is definitely two servings per glass. I just wanted to show the many layers and I didn't have a better single-style serving dish than these glasses! Small, clear bowls would be better serving dishes for this dessert, which makes 4 servings.
This is a fast and easy desert, but most importantly, so yummy! And we couldn't even tell that it was sugar-free jello or fat-free whipped cream {trying to keep things on the healthier-side around here}.
I hope you enjoy both of these "throw-together" recipes!
That said, the below salad and dessert ideas are something I pretty much just threw together. I can't take credit for originality, however, as my ideas really came from other sources. So please forgive the lack of precise amounts and measurements!
First off: my version of a Southwestern-style salad. I came up with this based off of what I have enjoyed most in restaurants when I order this kind of salad.
Southwestern Salad
{you'll want to adjust the amount of ingredients according to your own preferences, but what I list below makes enough for two nights of Southwestern Salad for Matt and myself as the main course--so 4 large salad servings altogether}
Ingredients:
1 package chicken breasts
1 large container of Organic Spring Mix lettuces
1 bag of "Taco" cheese {we definitely don't use the whole bag}
1 can black beans, drained and rinsed
1 can sweet whole-kernel corn, drained and rinsed
1 package Santa-Fe Style tortilla strips
1 container of a Chipolte salad dressing
I love this brand of tortilla strips:
Basically, the only prep I really need to do for this recipe {besides draining and rinsing the beans/corn} is to cook the chicken. I cook mine in the oven {20-25 min at 400 degrees F}, but I rub the chicken first with a mixture of poultry seasoning, a little kosher salt, and ground pepper. You can chop or shred your chicken; I like mine chopped. I've also cooked my chicken on the stove top to get more of a blackened-chicken, which is good, too!
Throw it all together and you've got a sweet, tangy, crunchy, utterly delicious salad! Like I mentioned, Matt and I like to eat this as our main dish, but it would be great as a side salad, too.
The picture below shows the ingredients pre-tossed; you can't see it, but there's a whole lot of lettuce under there!
*****
I got this dessert idea from a photo I saw on Pinterest, although I never went to the link. It's my version of a banana cream pie trifle!
Banana Cream Pie Trifle
Ingredients:
1 package instant, sugar-free Banana Cream pudding, prepared with skim milk
fat free whipped topping
2 bananas
approximately 25-30 Nilla wafers, turned to crumbs in a food processor
What I prepared in the photo above is definitely two servings per glass. I just wanted to show the many layers and I didn't have a better single-style serving dish than these glasses! Small, clear bowls would be better serving dishes for this dessert, which makes 4 servings.
This is a fast and easy desert, but most importantly, so yummy! And we couldn't even tell that it was sugar-free jello or fat-free whipped cream {trying to keep things on the healthier-side around here}.
I hope you enjoy both of these "throw-together" recipes!
Subscribe to:
Posts (Atom)